Table selector
Overview
The table selector focuses on table recognition and extraction. It is functional enough to fit all the needs of table extraction by itself, so you don't need to add any other selectors to the parsing flow for it to work.

Getting started
The key parameter of the Table selector is Headers which define the table structure.
Depending on the case they can serve as a filter to pick up the exact table that you need from the list of those detected automatically. In more tricky cases they can be used to actually "re-build" the table structure based on text columns using so-called Cluster algorithm.
Table headers is a required property and can be defined in several ways.
Select a table by drawing a rectangle around a part of it
pdf2Data can automatically detect a table structure when a portion of the table lies inside the region you draw on the PDF canvas. You can manually define the region around the table
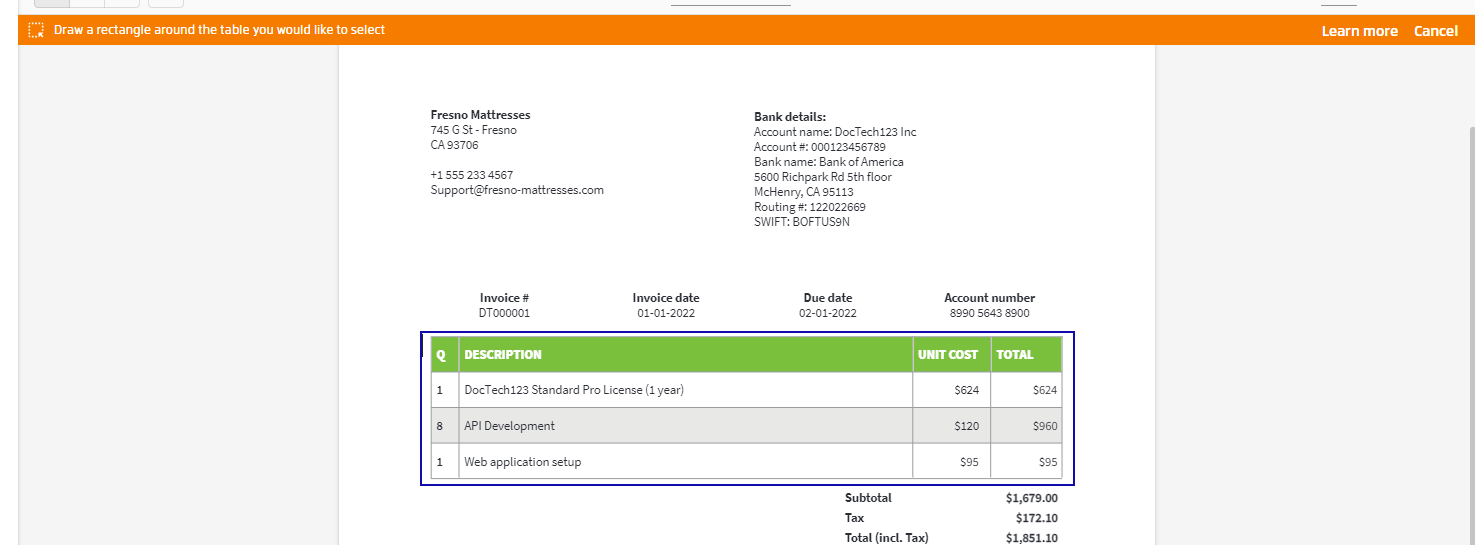
or select just a part of it.

In some tricky cases table headers might not be detected or detected inaccurately.
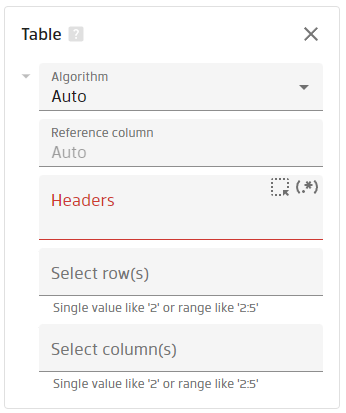
In such cases you can enter or correct them in the corresponding property text box. See more details on the headers parameter in the section below.
Properties
There are 5 properties that allow you to tune table detection or filter extracted data.
Algorithm
Defines an algorithm to recognize tables. Possible values are Auto and Cluster. Try each one to decide which one produces the better result.
Reference column
Sometimes, when not all table rows have horizontal borders or there are empty cells present, rows may be detected inaccurately. In this case, the reference column can be used by the selector to determine the table rows.
For this parameter, it is recommended to use the number of a column for which all cells will always have a value. So, in the case of invoices, it can be the "Total" column.
Headers
The key property to define the table's structure are the headers. This parameter is required for both algorithms.
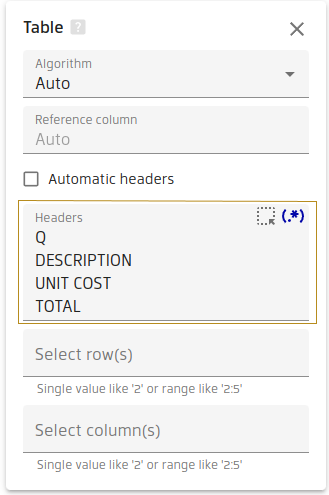
They can be defined in several ways.
Define exact headers semi-automatically
When you add table selector you will be prompted to select the part of the table which includes headers on the canvas.
You can also re-select the headers later by clicking the Select headers button .
Automatic headers
If the results of semi-automatic headers detection produce incorrect headers or table is not detected you can specify
less strict condition by checking "Automatic headers" checkbox and defining "Number of columns".
Manually
If you are not happy with the results, you can enter or edit the headers in the textbox at any moment. Headers should be entered, one below the other, starting with the leftmost. If any header consists of two or more lines, these lines must be concatenated into one, separated by spaces.
Regular expressions
One can also specify headers using regular expressions by clicking the icon in the top right corner of the headers property.
Select row(s)
This property defines rows to be filtered from the result. This is based on their indices from top to bottom. Indices start with 1. If present, a table header's row will also be indexed.
You can select a single number or a range. Using a negative number, it is possible to specify a backwards index where -1 is the last row of a table.
For instance. the 2:-2 range means that all table rows except for the first and the last ones will be extracted.
Select column(s)
This property defines columns to be filtered from the result. This is based on their indices from left to right. Indices start with 1.
You can select a single column using its index or header value as well as a continuous range start:end.
With a negative number, it is possible to specify a backwards index of a column, where -1 is the rightmost column of a table.
For instance. the 2:-2 range means that all table columns except for the left and the right ones will be extracted.
Table borders
In some tables vertical borders could be missed and in such case a Cluster algorithm would be used under the hood which tries to guess columns based on Headers field mentioned below. Horizontal borders are ignored in such case which can lead to unexpected results in detected rows, e.g.:
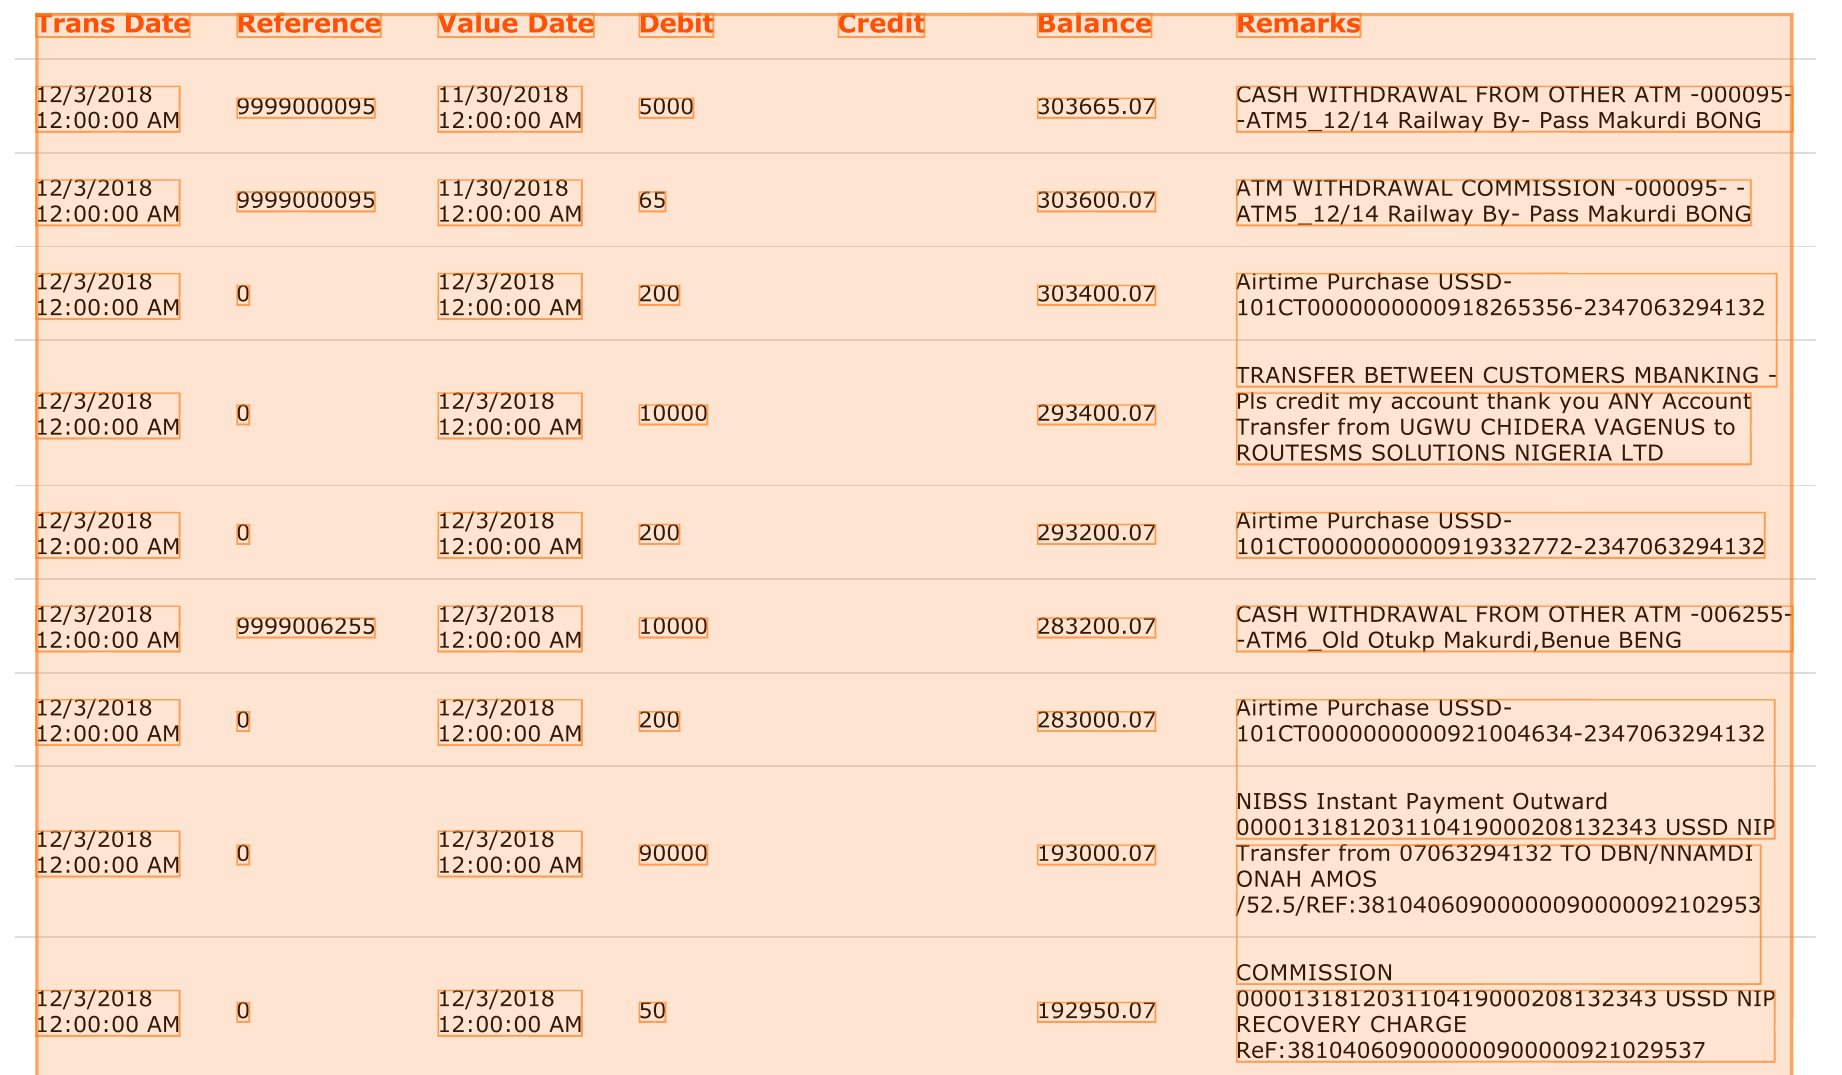
You can try to improve recognition result by adding vertical borders manually and forcing Border algorithm this way. To do so, click on table selector to activate it, as a result a button will be displayed in right bottom corner of the document. Click on the button and click where you want to add a new border:
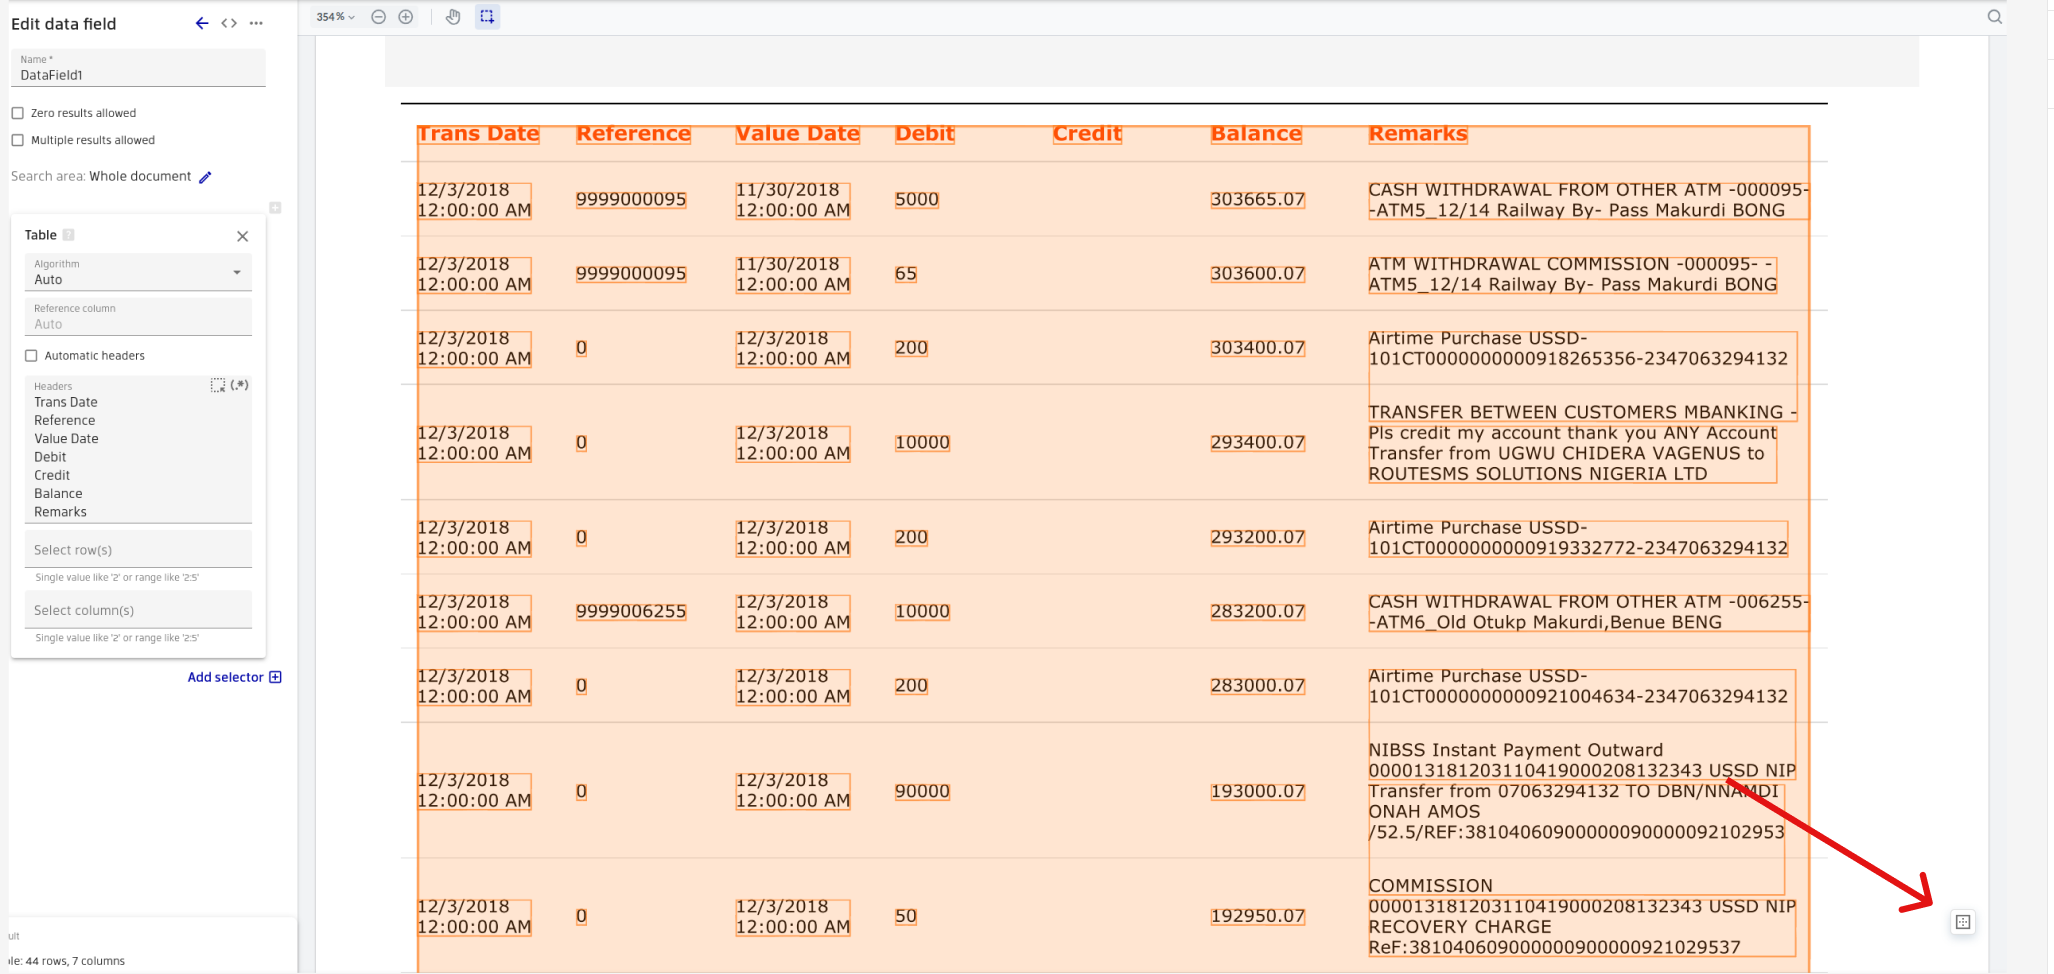
After all vertical borders are added the result should look like below:
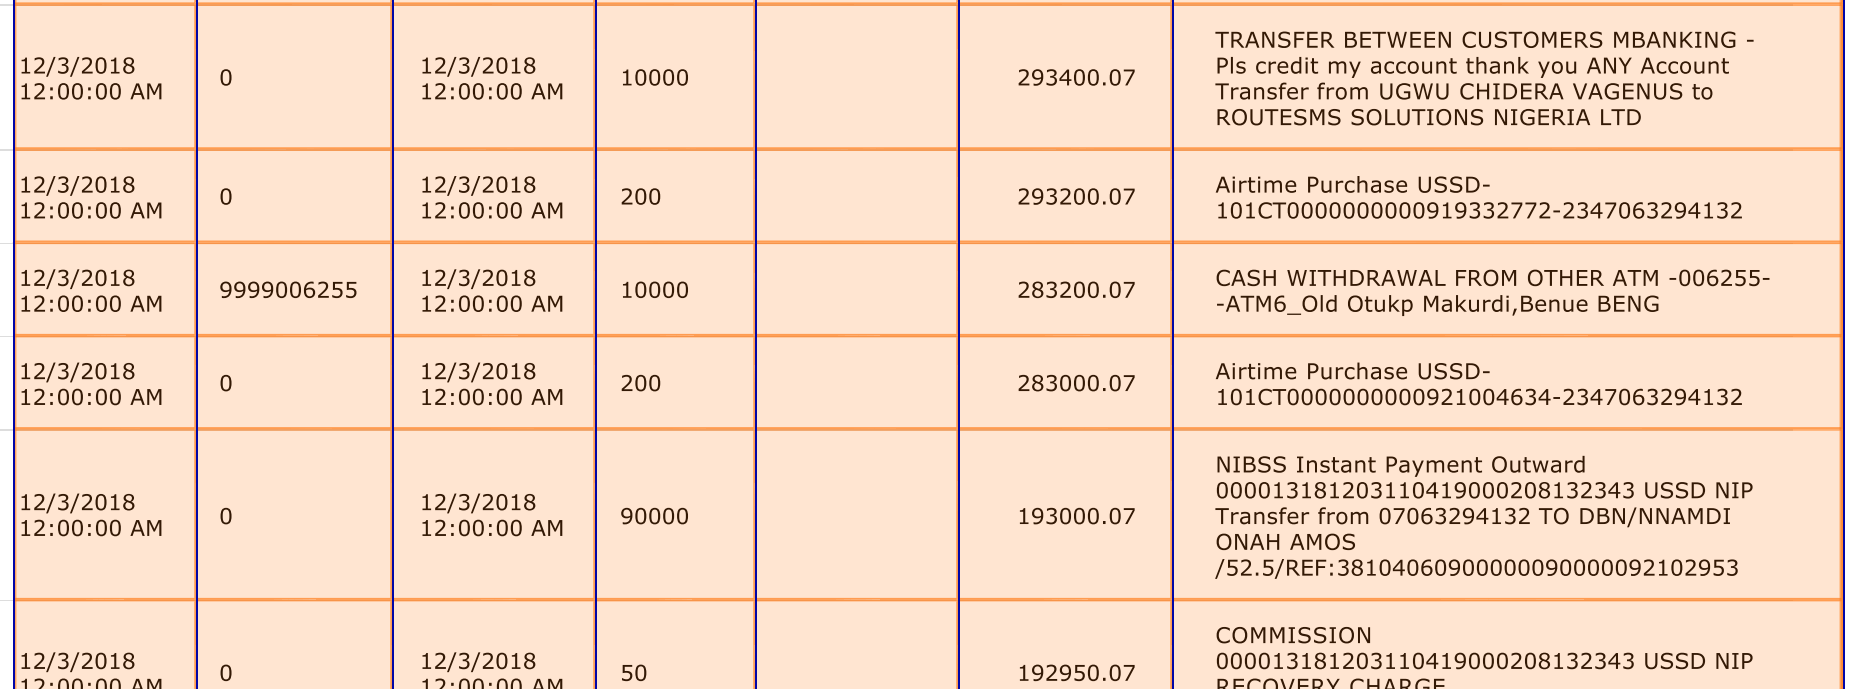
Result overview
The results can be reviewed in several ways.
First, we highlight the detected table and it's cells on the PDF canvas:
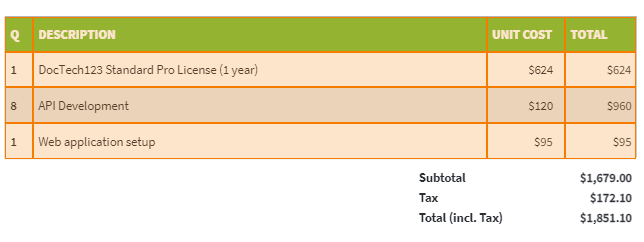
Second, there is a small overview in the bottom left results panel. When you have multiple results, clicking a line, will show you the corresponding table in the PDF canvas.
The line also contains a button to show the extracted data in a preview panel. You can hover any row of the table using cursor, it will be scrolled to and highlighted in the preview panel. Also, horizontal scroll is synchronized in the document and preview panel.
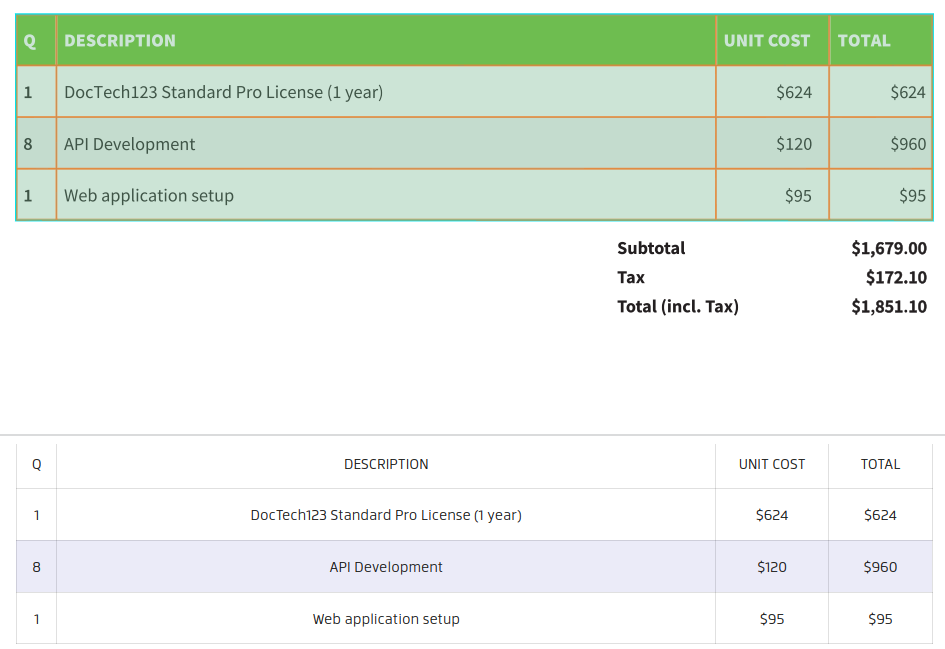
The format and example of the actual result produced by the pdf2Data Engine is described in Recognition result specification.
Tables over more than one page
If a table spans more than one page, the selection algorithm will select it as a single page, where all table columns have the same width on subsequent pages. The repeated header and footer (if any) are filtered out from the final results, so that only the first header and the last footer are retained.
The multipage selection algorithm also detects and ignores any page headers or footers.
Specification
To see more information about properties and expert usage visit specification page.